We use cookies to make your experience better. To comply with the new e-Privacy directive, we need to ask for your consent to set the cookies. Learn more.
Welcome to the wonderful world of VynEL™ lighting! This guide will help you get started in heat bonding your lighting elements to nearly any fabric.
Note: Do not try this technique with typical EL Panels. It will melt the laminate and ruin your panel!
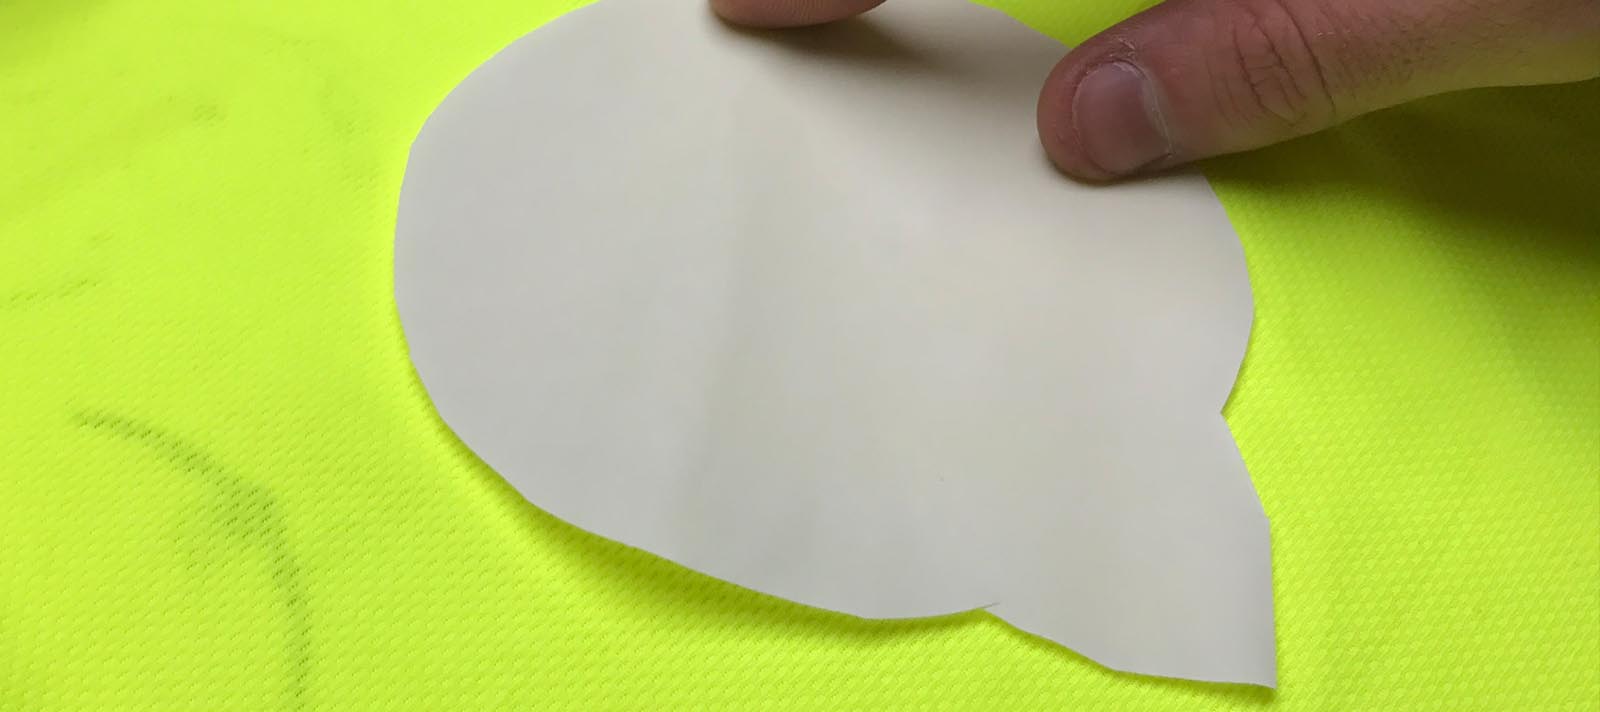
STEP 1: CUT OUT HEAT BONDING MATERIAL
In order to have the best results, we recommend cutting the heat bonding material to the exact shape that the VynEL™ panel is made. This will ensure the adhesive properties stretches to the edge of the panel. If the heat bond material spills out too much past the panel, the end result will not look as clean. Conversely, if you don't cut far enough and some of the edge of the VynEL™ light extends past the adhesive, this can lead to premature disengagement of the panel from the material. There are many heat bonding materials on the market and each one will have their strengths and weaknesses. The Ultra-Bond types of Heat 'n Bond are thicker and provide more rigidity, but are also stronger adhesives. This makes it more ideal for some wearable items that require a stronger hold.
PRO-TIP: Have some extra bonding material for the connection area, so it stays in place!
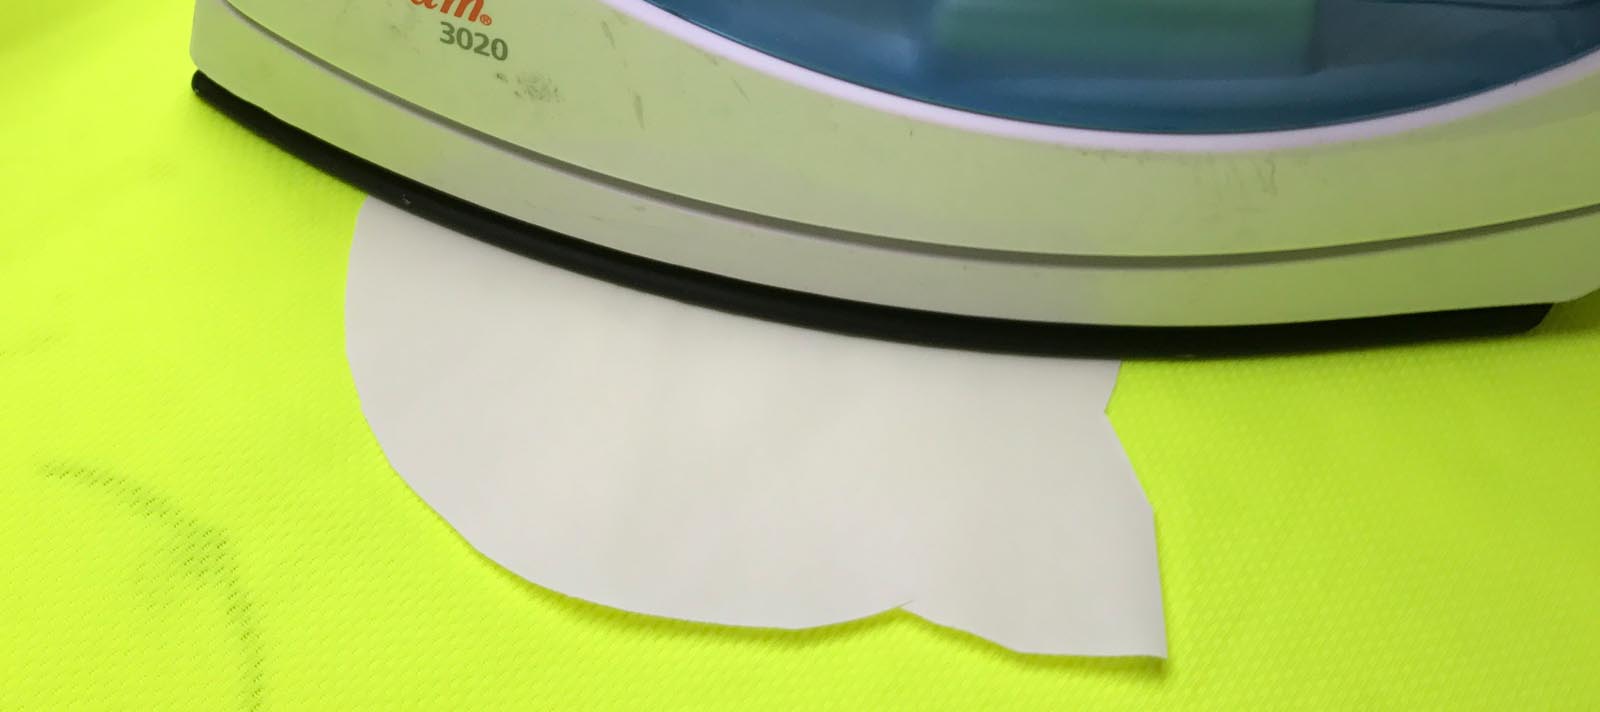
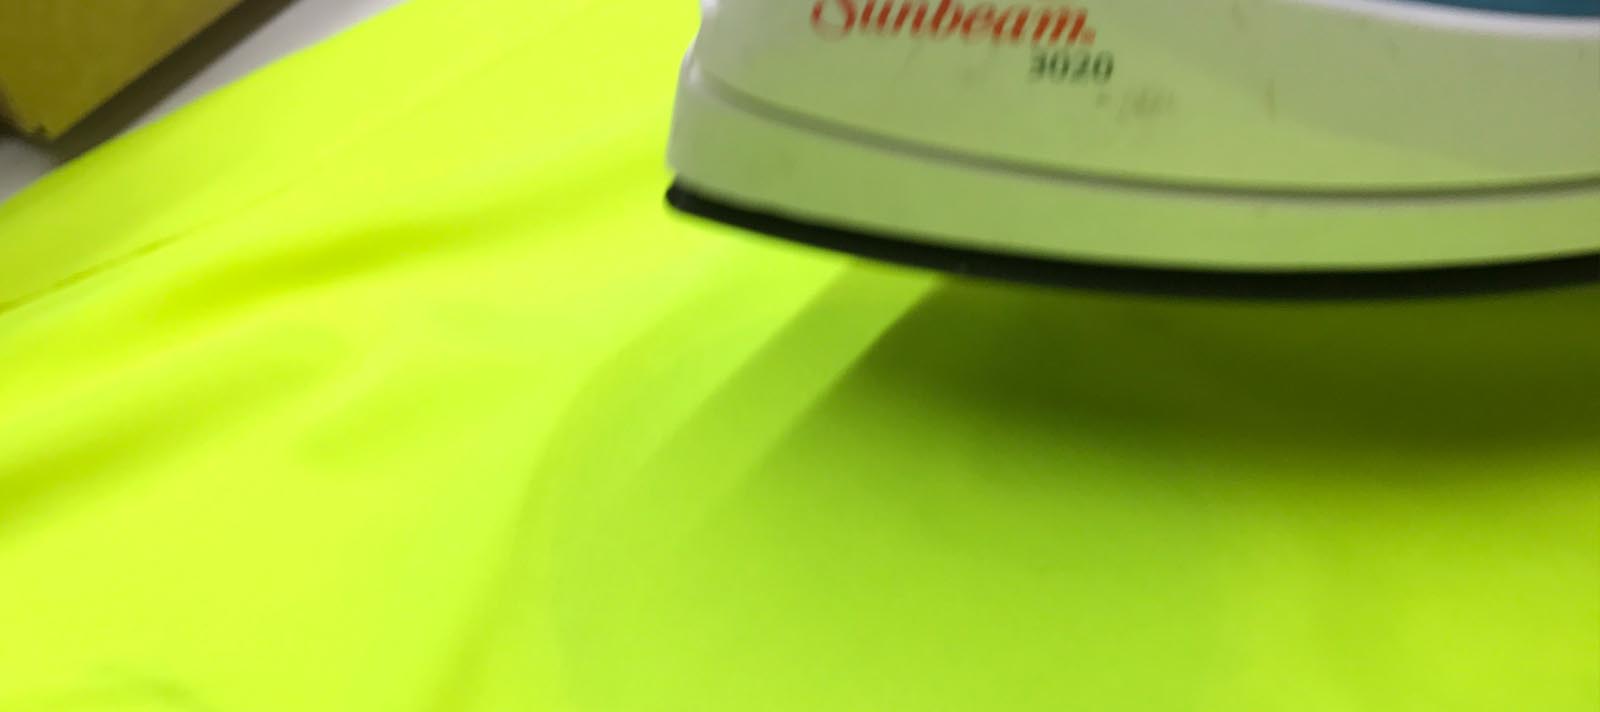
STEP 2: IRON HEAT BOND
The bonding material should be ironed to the garment first, this also gives a visual representation where the illuminated area will be located before it's stuck on there! Refer to the (heat bond) instructions in terms of heat and time to make a proper bond to the fabric. Remember to remove the white backing AFTER you give the bonding material ample time to cool down before proceeding to the next step!
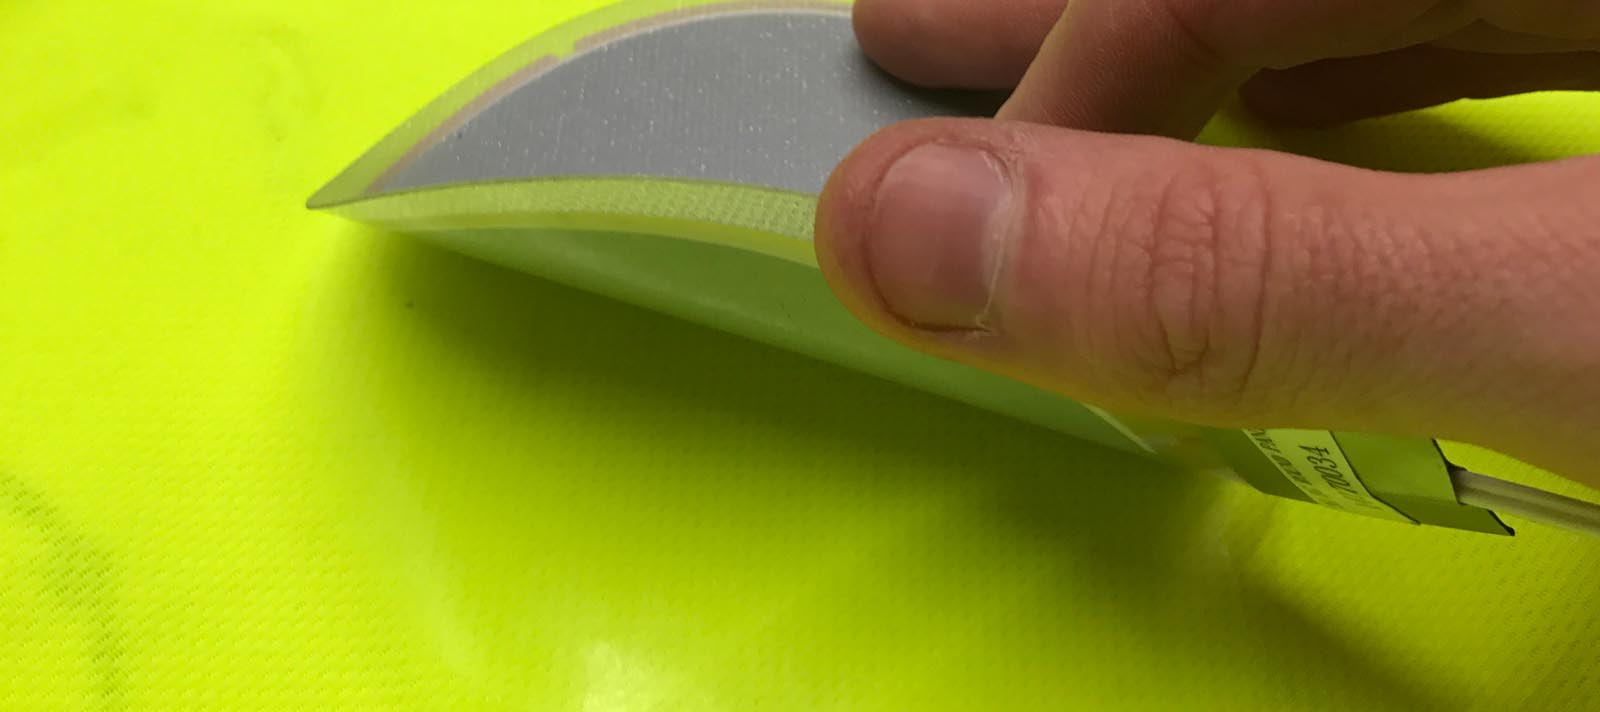
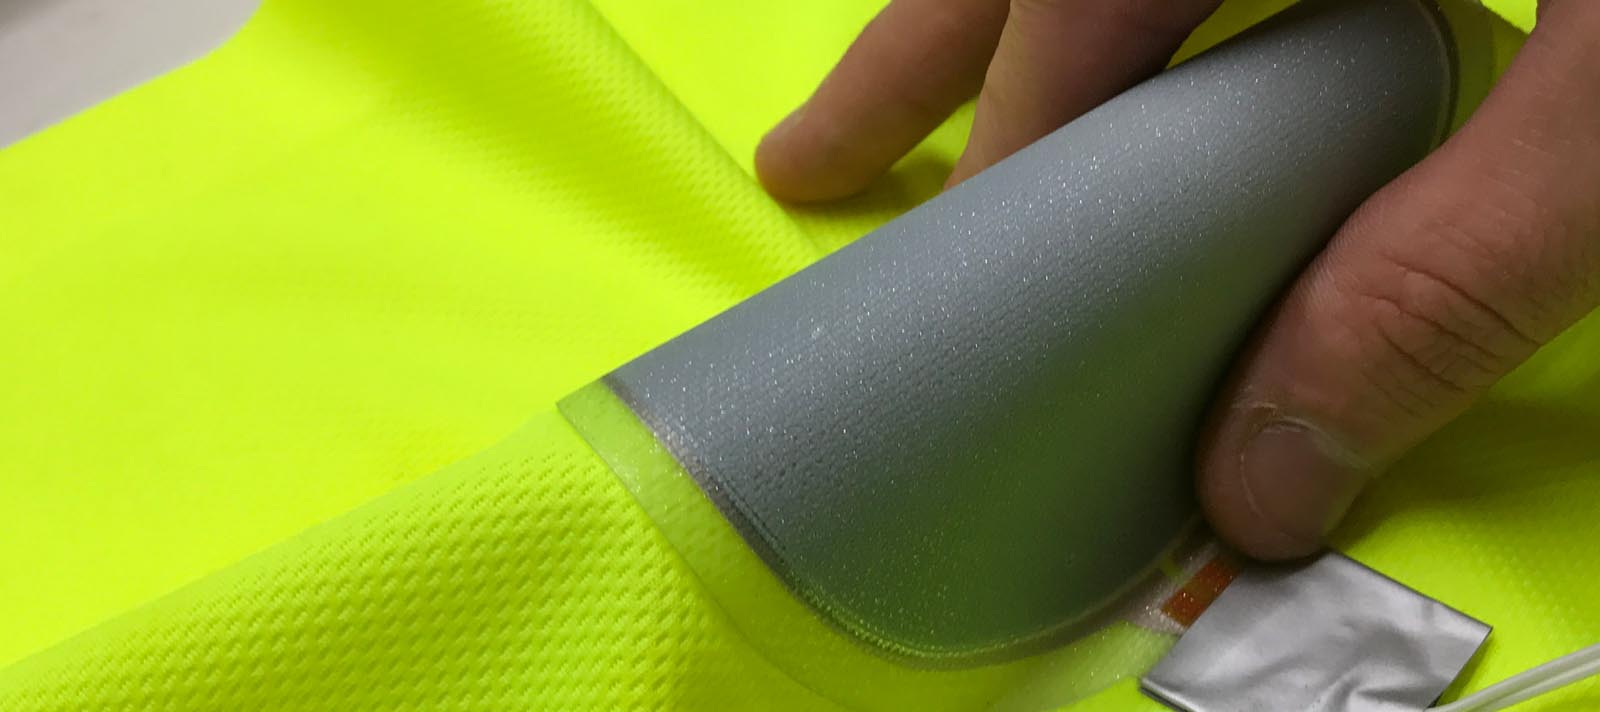
STEP 3: ALIGN AND FLIP GARMENT
This step is the MOST IMPORTANT and also requires a little bit of skill and patience. It's important to iron the backside of the panel, not the front. Take some time and align the VynEL™ panel directly on the bonding material, then once it's perfectly aligned, flip over the garment so you are ironing on the BACKSIDE of the panel. You will actually be ironing the backside of the fabric, so it's a little bit of a guessing game for alignment. Take a couple extra seconds to lift up your garment and make sure your alignment is set. Once it's where you want it, give some pressure to the iron and make small circles where the material is located. Be sure to read the heat bond instructions for appropriate time and heat settings.
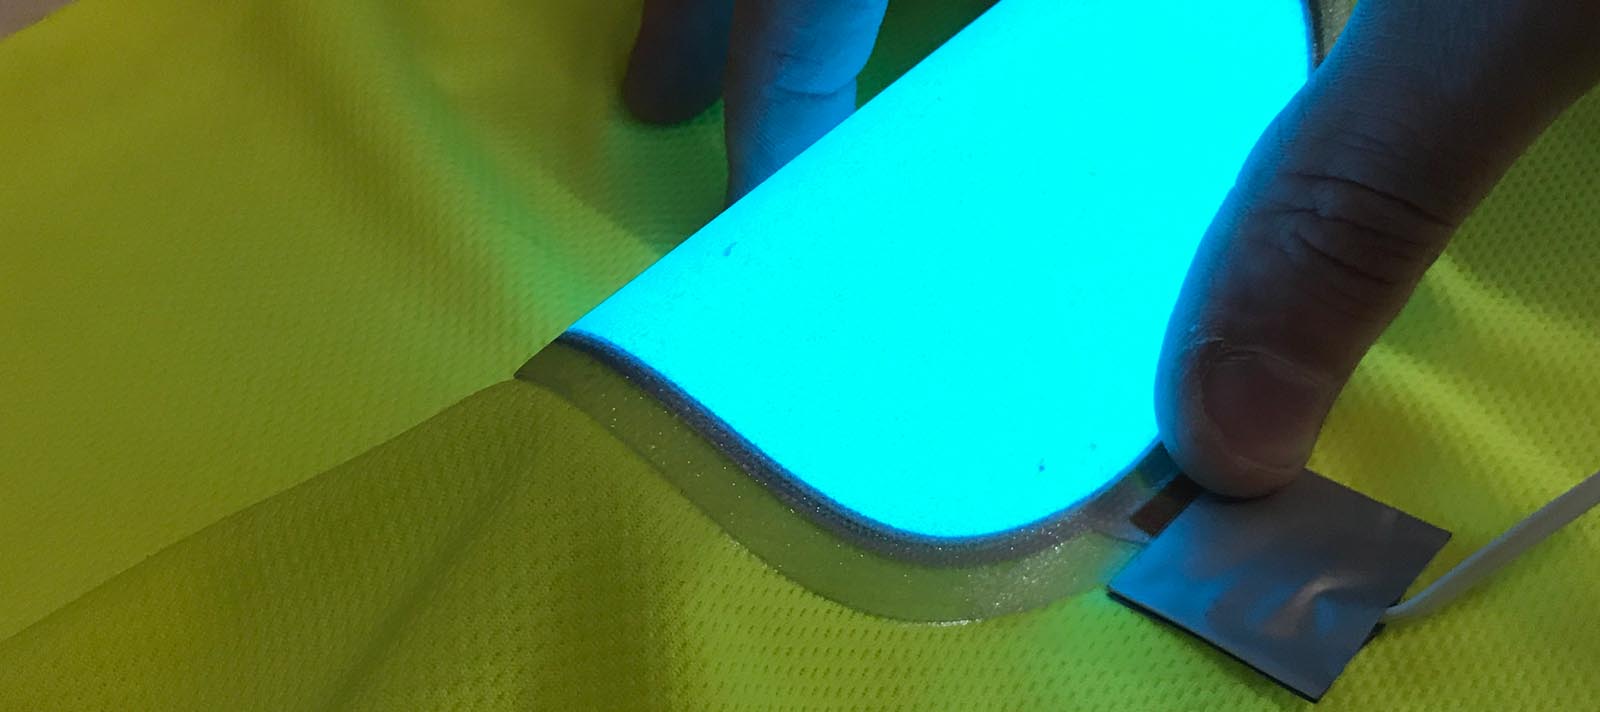
STEP 4: LET COOL AND TEST
It's common on your first attempt to not get it perfect. Either the panel was misaligned or you didn't give enough pressure or heat on the iron. In this case, you can usually try again until you get it right. You know when you get a good bond once it's cool (wait about a minute) and try lifting up on the sides of the panel. You shouldn't be able to separate the panel easily with your hands. If so, try again.
We hope you enjoyed this Guide to Heat Bonding VynEL™. If you would like to learn more about VynEL or purchase various off-the-shelf shapes and sizes, click the link below. If you would like more information about custom VynEL™ panels or information about manufacturing VynEL™ with your product, please call or email us at: 877.615.6556 or info@ellumiglow.com.